The durability and performance of your car depend greatly on proper engine care. One of the most important maintenance tasks is checking and changing the engine oil. Oil plays a crucial role in preventing the engine from overheating, reducing friction, cleaning moving parts, and removing impurities. This article will guide you through the steps to check and replace your car’s engine oil.
Checking Your Car’s Oil
Gather the Necessary Tools
You will need:
• A paper towel or clean rag to check the oil level
• Optional latex or nitrile gloves
• Your vehicle’s owner’s manual for reference
Park on a Level Surface
Ensure the engine is off and the car is parked on a flat surface. If the engine has been running, let it cool for ten to fifteen minutes. This allows for an accurate oil level reading.
Locate the Dipstick
Open the hood and locate the oil dipstick. It is typically near the engine and marked with an orange or yellow handle. If you’re unsure, refer to your owner’s manual.
Remove and Clean the Dipstick
Pull the dipstick out and wipe it clean with a rag. This removes any residual oil and provides a clear readout.
Check the Oil Level
Reinsert the dipstick fully, then remove it again to check the oil level. The dipstick usually has markings indicating “Full” and “Low.”
• If the oil level is between the markings, it is sufficient.
• If it is below the lower marking, you need to add oil.
Inspect the Oil Condition
Rub a small amount of oil between your fingers. Fresh oil appears amber in color, while old oil looks dark and gritty. If the oil appears dirty or has a burnt smell, it’s time for an oil change.
Replacing Your Car’s Oil
Prepare the Car
Engage the parking brake and park on a level surface. If your car has low ground clearance, use a jack and jack stands to raise it safely.
Drain the Old Oil
- Locate the Drain Plug: Found at the bottom of the oil pan beneath the engine. Refer to the manual if needed.
- Place the Drain Pan: Position it under the plug to collect the old oil.
- Remove the Drain Plug: Use a socket wrench to unscrew the plug carefully. Allow all oil to drain out, which may take several minutes.
- Replace the Drain Plug: Once draining is complete, wipe the plug clean and reattach it securely.
Remove and Replace the Oil Filter
- Locate the Oil Filter: It is usually a cylindrical part near the engine.
- Unscrew the Old Filter: Use an oil filter wrench to loosen and remove it. Some oil may spill, so keep the drain pan in place.
- Prepare the New Filter: Lightly coat the rubber gasket of the new filter with fresh oil to ensure a proper seal.
- Install the New Filter: Screw in the new filter by hand until snug, then tighten it slightly more—about a quarter turn. Avoid over-tightening.
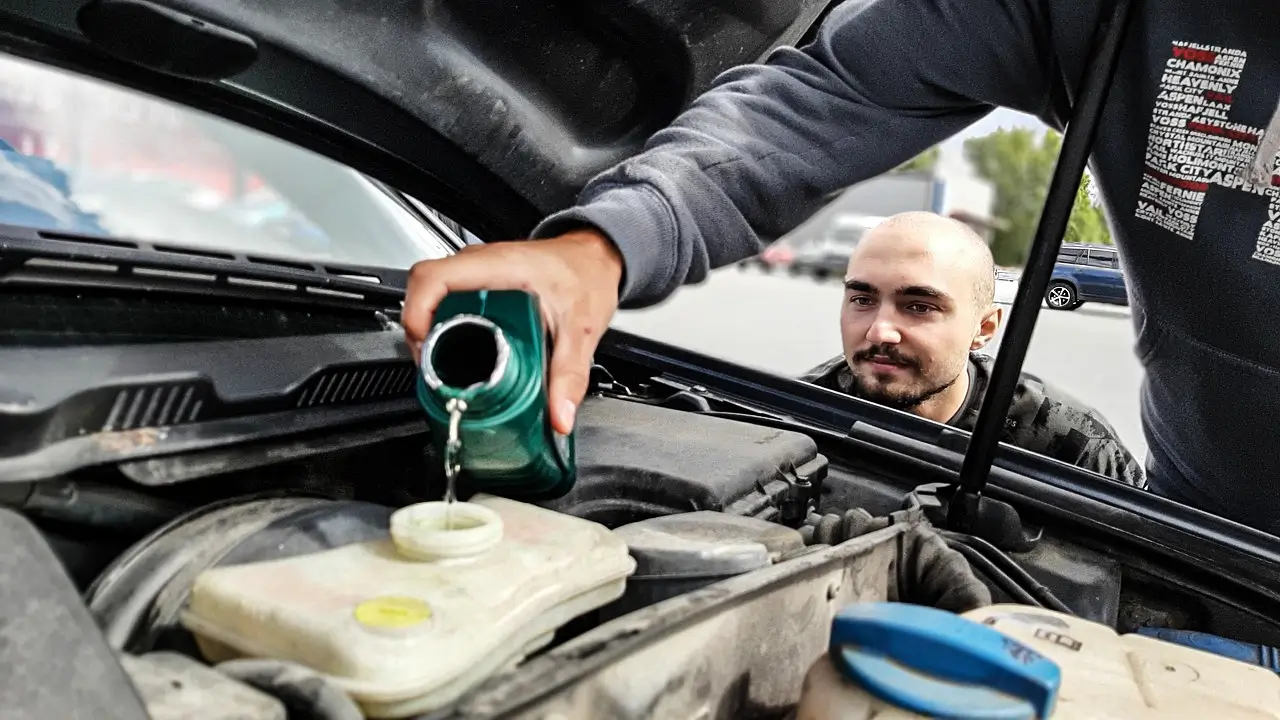
Add New Oil
- Locate the Oil Filler Cap: Under the hood, typically labeled “Oil” or marked with an oil can symbol.
- Pour in the New Oil: Use a funnel to add the recommended amount of oil.
- Check the Oil Level: Let the oil settle for a minute, then check the level using the dipstick. Add more if needed, but do not overfill.
- Replace the Oil Cap: Secure it tightly.
Start the Engine and Check for Leaks
- Start the engine and let it run for a few minutes to circulate the new oil.
- Turn off the engine, wait a few minutes, and recheck the oil level. Adjust if necessary.
By following these steps, you can help extend the life of your vehicle by keeping the engine properly lubricated and performing efficiently.
- Audi GT50 Concept: A Loud Reminder of Why Car Enthusiasts Fell in Love With Audi
- Nearly 30% of UK Drivers Believe Car Tax Should Be Based on Mileage — Survey
- Why Planes and Boats Escaped the Luxury Tax But Cars Didn’t
- Australia’s Headlight Confusion: Authorities Warn Drivers After Viral $250 Headlight Rule Goes Wild Online
- 2025 Hyundai Venue Facelift Launched in India – Full Details, Variants, and Price